Setup KVM on VMWare Workstation

This is something very basic but thought of sharing with beginners.

Here is something that I have tested and works absolutely fine.

  1. KVM is an opensource Type 2 hypervisor installed on Linux machines.

Below mentioned is the procedure to setup KVM in a virtual Environment (VMWare Workstation)
_________________________________________________________________________________

Step 1: Install kvm
terminal# apt-get install qemu-kvm libvirt-bin virtinst bridge-utils cpu-checker
_________________________________________________________________________________
Step 2: Verify kvm installation
Ideally the output should be:
terminal# kvm-ok
INFO: /dev/kvm exists
KVM acceleration can be used
If you come across something like this :
INFO : Your CPU does not support KVM extensions
KVM acceleration cannot be used
terminal# ls -l /dev/kvm
ls: cannot access ‘/dev/kvm’: No such file or directory
Make the following changes on the workstation :
 Workstation Config

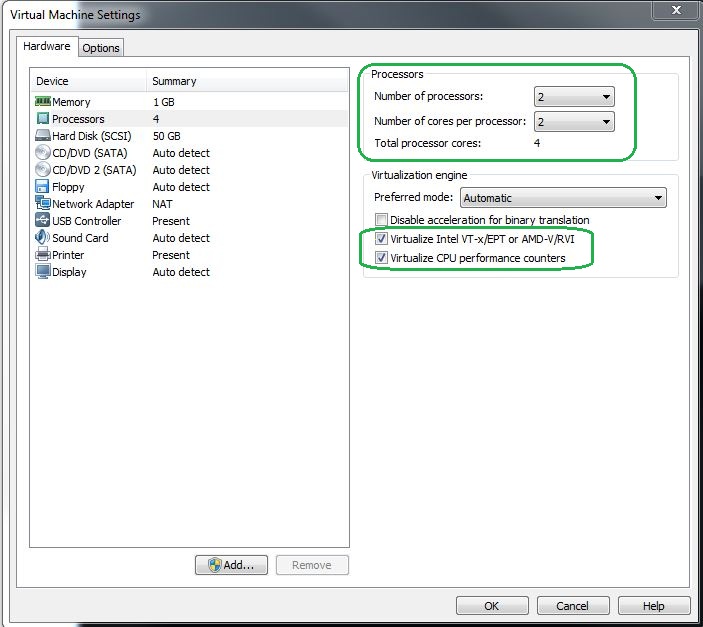
Start the server again and execute the command “terminal# kvm-ok”.

INFO : /dev/kvm exists
KVM acceleration can be used
_________________________________________________________________________________
Step 3 : Check libvirtd status : For QEMU/KVM to connect you need to have libvirt daemon active.
terminal# systemctl status libvirtd
If libvirt daemon is not active, you need to manually start the service using the following command :
terminal# systemctl start libvirtd
_________________________________________________________________________________
Step 4 : Working on getting the GUI access : Need to install virt-manager
terminal# apt-get install virt-manager
To open the GUI :
terminal# virt-manager
This is what a KVM looks like :

KVM-GUI

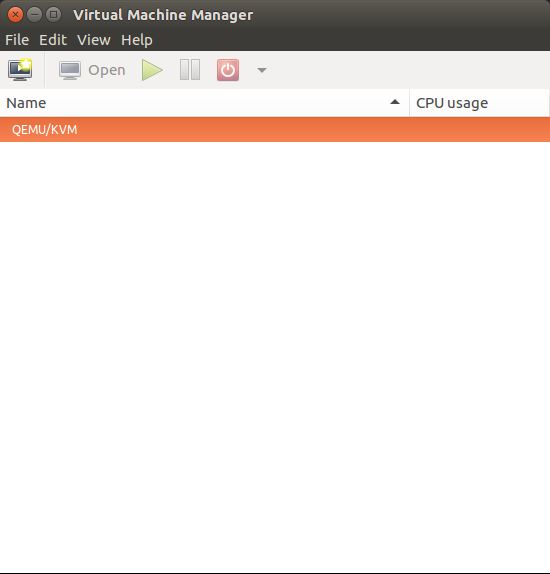
That is all. KVM should work absolutely fine.
Note :
  1. To deploy PA you need to allocate RAM > 4 GB.
  2. Also make sure that you configure bridged network on Ubuntu before installing PA. (I will share the details sometime later about the same. This email is just to make you guys aware of KVM)
  3. Installing KVM on Kali Linux is bit tricky as kali cannot find libvirt-bin in its repository (Please stick to Ubuntu Server 14 TLS).

Create a new user with sudo permission in Kali Linux 2

  1. Open the terminal and type in the command :
    useradd -m username
    ## -m creates a home directory for the user.
    useradd
  2. Set the password for the above user :
    passwd username
    ## This will prompt you to enter a password.
    userpassword
  3. At this point we have added a new user. But we need to put this user in “sudoers” group so that this user can use “sudo” commandto perform administrative tasks.

    Type in the command :
    usermod -a -G sudo Testuser
    ## -a means add
    ## -G sudo means to add the user to sudoers group
    usersudoersgroup

  4. Atlast we have to specify the shell for the new user.
    Excecute the following command:
    chsh -s /bin/bash username

    NOTE :
    a. You can delete the user using the following command :
    userdel username

    b. In the above screenshots the commands are preceeded by “sudo” because these have been executed by a non root user.

Create a Desktop item for an application you installed in Kali Linux 2

Execute the following commands via the Terminal :
——————————————-

apt-get install –no-install-recommends gnome-panel -y
gnome-desktop-item-edit /root/Desktop/ –create-new

NOTE: If you’re not running as root, don’t use the “/root/Desktop” path, use “~/Desktop” instead:
gnome-desktop-item-edit ~/Desktop/ –create-new

Share Folder for Kali Linux on VMWare Workstation is not visible

Solution is :

1 – Run: apt-get install dkms linux-headers-$(uname -r) build-essential psmisc

2 – Run: git clone https://github.com/rasa/vmware-tools-patches.git

3 – Run: cd vmware-tools-patches/patches

4 – Remove every folder except “vmhgfs”.

5 – Get the last version of VMwareTools clicking on VMWare Bar > VM > Install/Reinstall VMWare Tools. It will open a virtual CD containing the “tar” file.

6 – Copy VMwareTools-9.2.4-1398046.tar.gz to “vmware-tools-patches” folder.

7 – On “vmware-tools-patches” folder, run: ./untar-and-patch-and-compile.sh

NOTE : If ./untar-and-patch-and-compile.sh throws an error “Unable to delete open-vm-tools due to dependencies by open-vm-tools-desktop” execute the following command : apt-get remove open-vm-tools-desktop

8. Go to VM settings and enable and select the folder from base OS to be shared. You should find the shared folder in /mnt/hgfs/<Shared Folder Here>